How to Build a Wood Privacy Fence — Complete DIY Guide
A 150-foot privacy fence costs $4,000-$8,000 from a contractor. Build it yourself for $1,500-$3,500 in materials. This guide covers every step with photos, pro tips, and the tools you need. Use our fence calculator to get your exact material list before you start.
Tools & Materials You Need
Gather everything before you start. Nothing kills momentum like a mid-project hardware store run.
Tools
- Post hole digger ($35-50) or rent a 2-person power auger ($50-75/day) — worth it for 10+ posts
- 4-foot level and torpedo level
- String line or mason's line and stakes
- 25-foot tape measure
- Cordless drill and impact driver — two tools speeds the job up enormously
- Circular saw or miter saw
- Speed square
- C-clamps or spring clamps (at least 4)
- Shovel, wheelbarrow, and 5-gallon bucket
- Safety gear: safety glasses, work gloves, ear protection (for saw/nailer), and dust mask when cutting pressure-treated lumber
Materials
- 4x4 posts (6x6 for gate and corner posts)
- 2x4 horizontal rails (3 per section for 6ft fences)
- 1x6 fence boards/pickets
- Fast-setting concrete (2 bags per 4x4, 3 per 6x6)
- Gravel for post hole drainage
- Galvanized or stainless steel exterior screws (not nails)
- Metal rail brackets (Simpson Strong-Tie FB24Z or similar)
- Gate hinges, latch, and drop rod
- Post caps
Fastener warning: If using pressure-treated lumber, you must use stainless steel or hot-dipped galvanized fasteners. The copper preservatives in PT wood corrode standard zinc-plated screws within 1-2 years.
Plan Your Layout & Get Permits
Proper planning prevents the expensive mistakes that ruin fence projects. Complete these tasks before buying a single board:
- Check local codes: Call your city/county building department for height limits, setback requirements, and permit needs. Front yard fences and fences over 6 ft almost always require a permit. See our height regulations guide.
- Call 811 (mandatory): Federal law requires calling 811 at least 48 hours before digging. A locator marks underground gas, electric, water, and cable lines — for free. Hitting a gas line is genuinely dangerous.
- Verify property lines: Find your plat survey from closing documents. If you can't find it, get a fresh survey ($300-800). Building even a few inches over the line can result in a court order to remove the entire fence.
- Talk to your neighbors: Show them your plan, agree on placement, and discuss which side faces out. This 10-minute conversation prevents years of conflict.
- Calculate materials: Measure total fence length along your planned route. Use our fence calculator for an itemized list with costs. Order 10% extra for waste, miscuts, and warped boards.
Pro tip: Walk the fence line and check for large roots, rock outcroppings, or drainage paths. These are much easier to plan around now than to discover mid-dig.
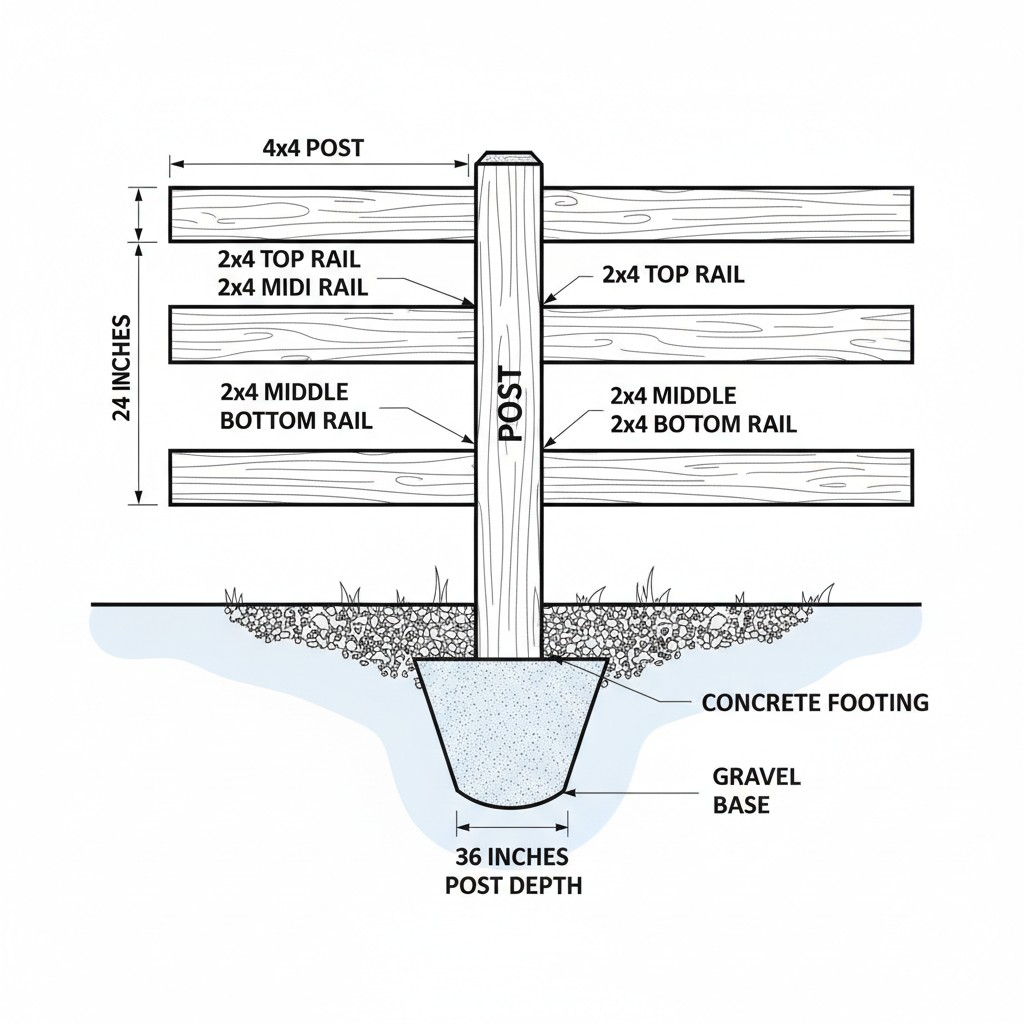
Dig Post Holes & Set Posts in Concrete
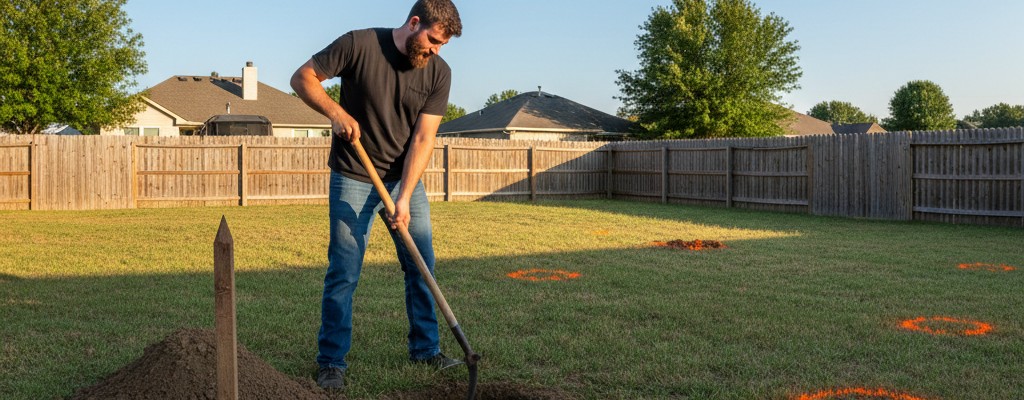
This is the most physically demanding step and the most important to get right. Rushed posts = a crooked fence for the next 20 years.
Set corner & end posts first
Corner posts are your reference points. Everything else aligns to them.
- Dig holes: 3x the post width (12" diameter for a 4x4) and 24" deep minimum — that's the standard for a 6ft fence using 8ft posts (the most common lumber size). In cold climates with deep frost lines, go 30-36" for extra stability. See our post depth guide for details by height and climate.
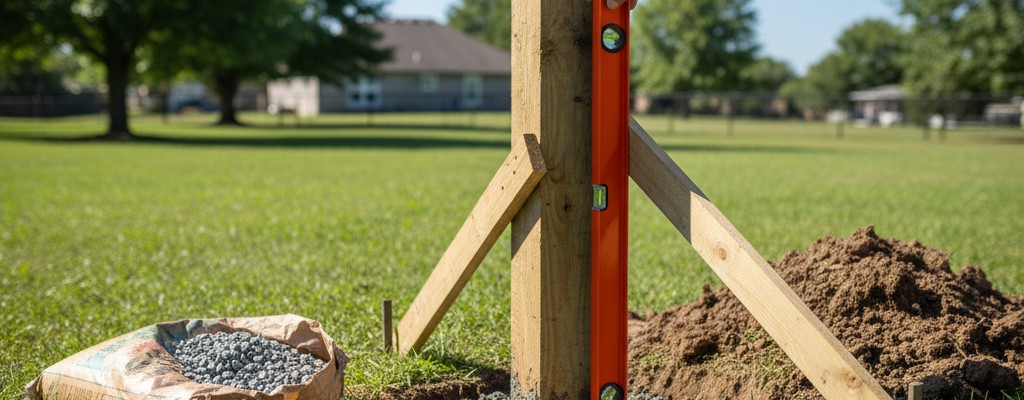
- Add 4" of gravel: Tamp it down. This drains water away from the post base — the #1 cause of premature post rot.
- Set plumb & brace: Place the post, check plumb on two adjacent sides, and brace with 2x4 stakes screwed at 90 degrees to each other.
- Pour concrete: Add fast-setting concrete dry, then add water per bag directions. Crown the top so water runs away from the post. See our concrete quantity guide.
- Wait 24 hours before hanging any weight. In cold weather, wait 48 hours.
Then set line posts
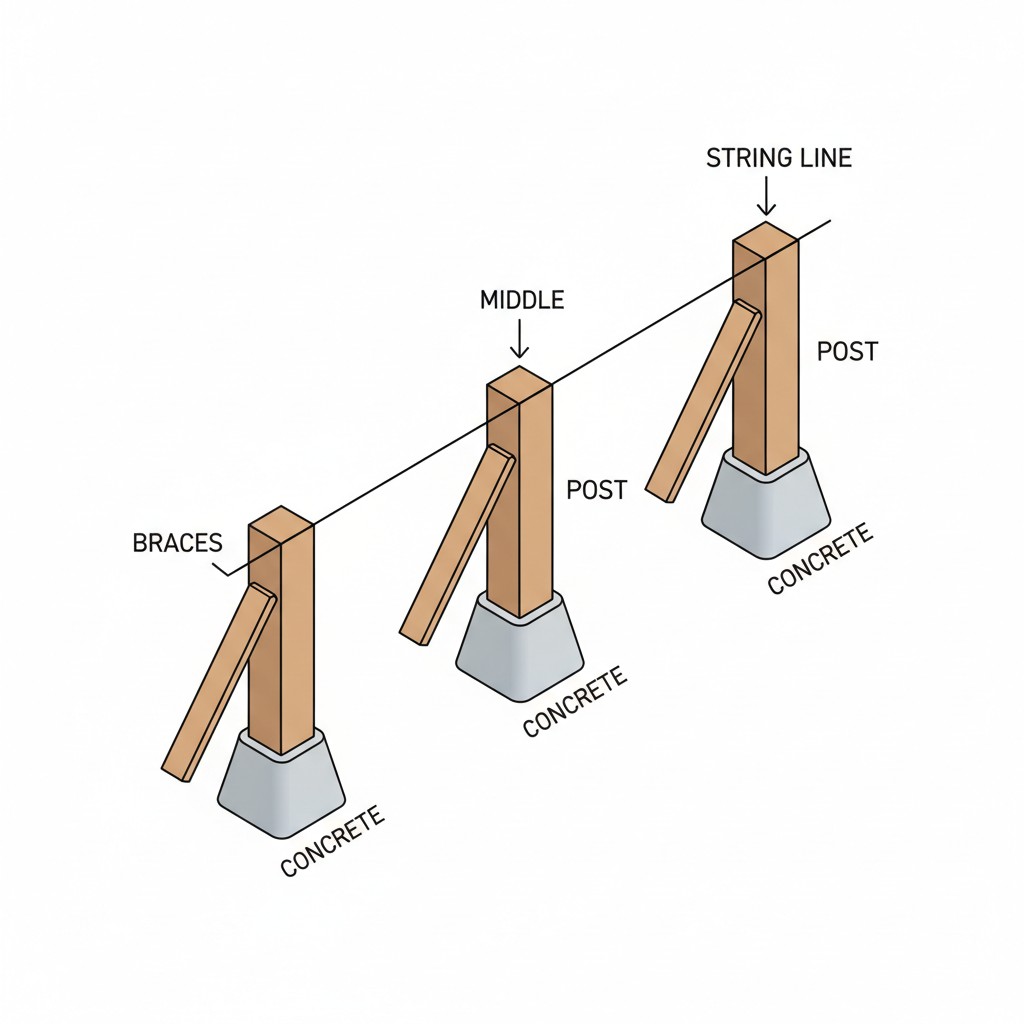
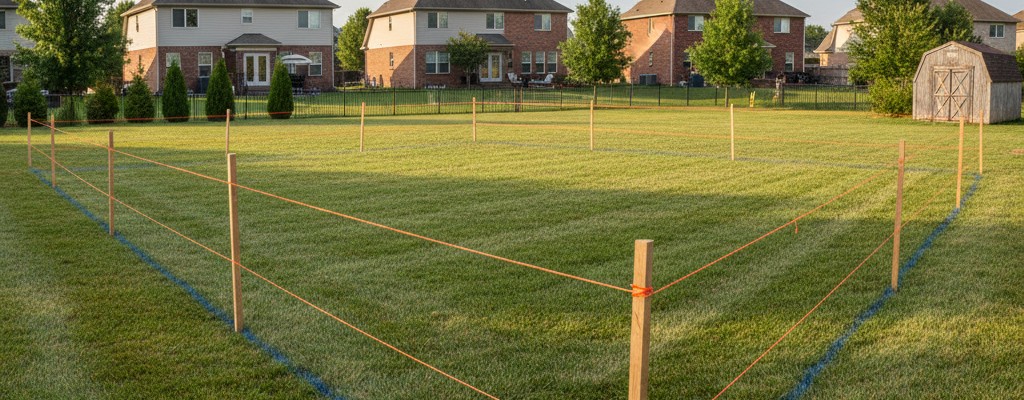
- Run a string line between corner post tops — every line post aligns to this.
- Mark spacing at 6 or 8 ft on center. If the last section is oddly short, split the difference between the last two sections.
- Dig, set, brace, concrete each post. Each should just barely touch the string line without pushing it.
Alignment trick: Instead of relying only on a string line, screw a straight 10-foot board across the tops of your end posts. This creates a rigid reference edge that wind can't move. Set each interior post to touch the board, then remove it and move to the next span.
For details on post counts, see how many fence posts do I need.
Attaching to a building wall
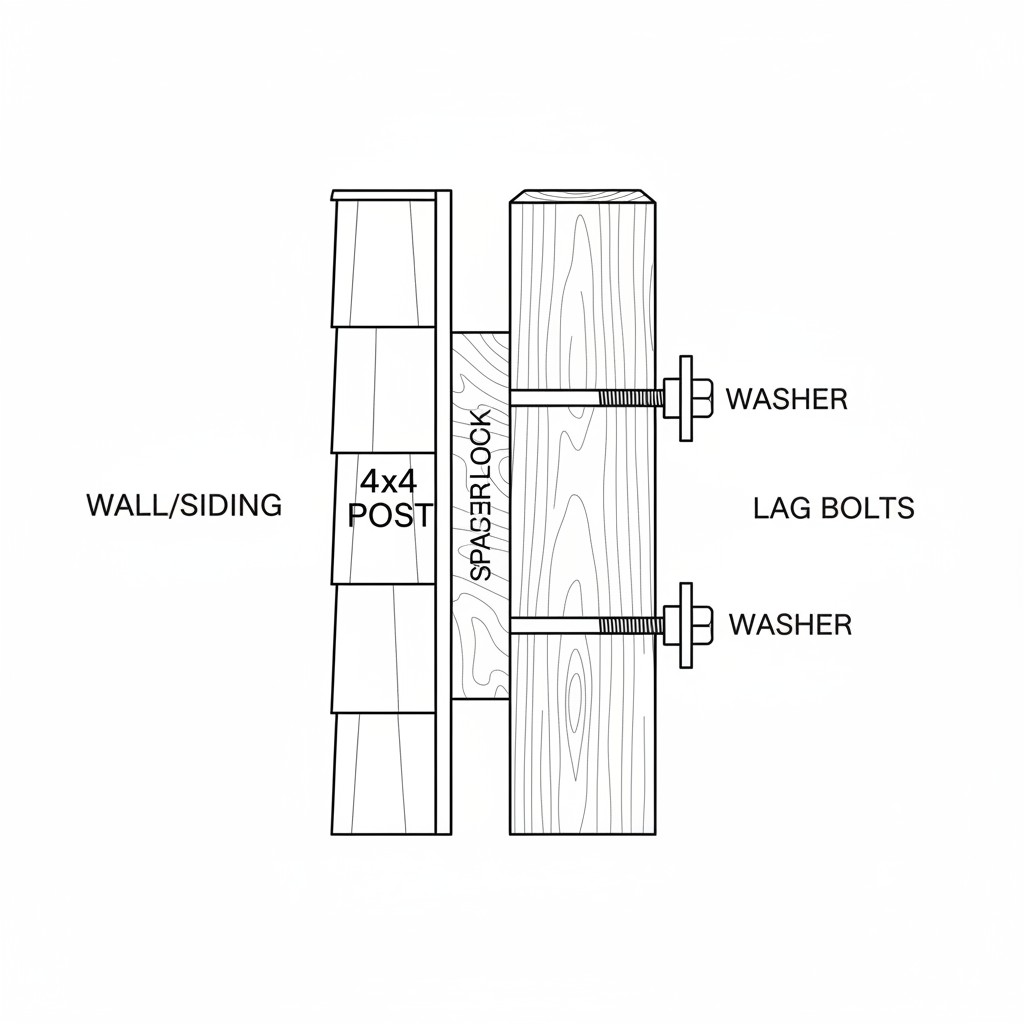
If your fence terminates at a house, garage, or shed wall, you don't dig a post hole — you lag-bolt a post directly to the structure:
- Use a spacer block (a pressure-treated 2x4 cut to 3.5" squares) between the post and the siding. This creates an air gap that prevents moisture from being trapped against the wall.
- Drill through the post and spacer into the wall framing (not just siding). Use a stud finder to locate framing.
- Fasten with 3/8" x 5" lag bolts with washers — at least 3 bolts, evenly spaced. Pre-drill the lag bolt holes.
- Seal the bolt holes with exterior caulk to prevent water intrusion into the wall.
Recommended products for this step
Fiberglass handles, 6.5" spread. Essential if not renting an auger.
View on Amazon →Sets in 20-40 minutes. Pour dry into hole, add water. No mixing.
View on Amazon →Product links may earn a small commission at no cost to you.
Install Horizontal Rails
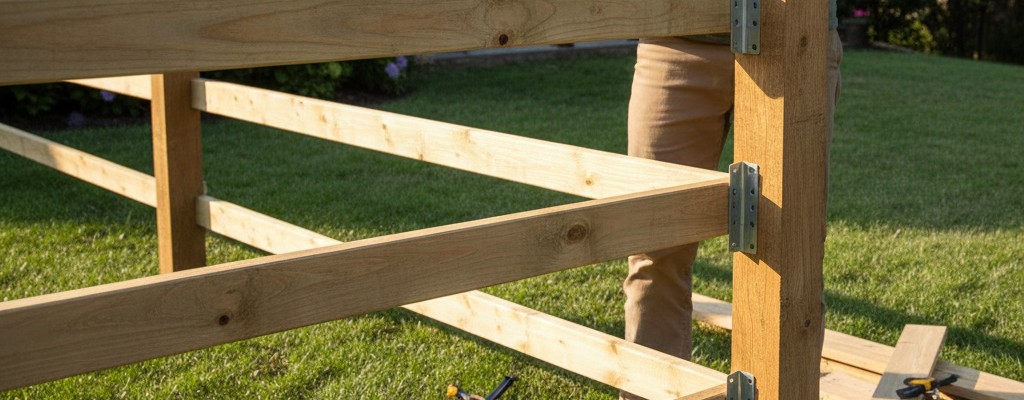
Rails are the horizontal 2x4s that span between posts and support your fence boards. A 6-foot privacy fence needs three rails.
Rail placement
- Top rail: 6-8 inches below the top of the post (or flush if you plan to trim posts to fence height).
- Bottom rail: 6-8 inches above ground level. Keeping it off the ground prevents moisture wicking and rot. Boards should extend below the rail but stop 1-2" above grade.
- Middle rail: Centered between top and bottom. This prevents boards from bowing outward and significantly increases wind resistance.
Two attachment methods
| Method | Pros | Cons | Cost |
|---|---|---|---|
| Metal rail brackets | Strongest, fastest, most forgiving | ~$1.50-3 per bracket | $50-100 for 150ft fence |
| Toe-nailing (screws at angle) | No extra hardware cost | Harder to get tight, splits wood if not careful | $0 (just screws) |
Recommendation: Use brackets. They cost $50-100 extra for a 150ft fence but save an hour of frustration and create a stronger joint. If toe-nailing, pre-drill to prevent splitting and use three 3" screws per connection (two from one side, one from the other).
Attach Fence Boards (Pickets)
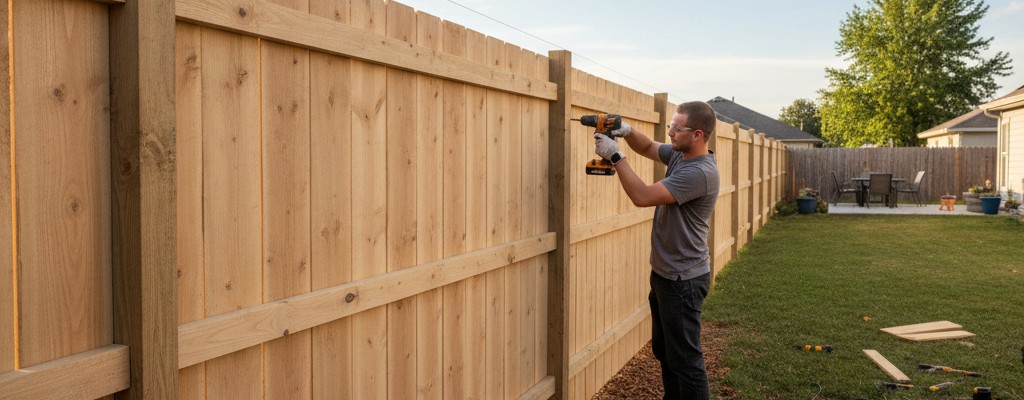
This is the most satisfying part — watching your fence take shape one board at a time. But take your time getting the first board right, because every subsequent board references it.
The process
- Start at a corner or end: Position the first board against the post, check plumb with a level, and drive two screws at each rail (6 screws total for 3 rails). Use 1-5/8" or 2" exterior screws.
- Set board height with a string line: Run a taut line at the top of the first board across to the end post. Every board top aligns to this line. If your ground slopes and you're stepping the fence, each section resets at the post.
- Butt boards tight for privacy: For zero gaps, press each board firmly against the previous one before screwing. Wood shrinks as it dries — boards that start tight will develop small gaps naturally, which is fine.
- Check plumb every 4-5 boards: Put a level on every 4th or 5th board. If drift starts, correct it immediately. A tiny adjustment now prevents a visible lean at the end of the run.
Screws vs nail gun
You have two good options for fastening pickets:
| Method | Speed | Hold | Best for |
|---|---|---|---|
| Exterior screws (drill) | Slower | Excellent — won't back out | Small jobs, or if you value easy board replacement |
| Ring shank nails (nail gun) | 2-3x faster | Excellent — ring shank grips as well as screws | Large fences (100+ ft) where speed matters |
If you're building 100+ feet of fence, a framing nailer with ring shank nails is a game-changer. Ring shank nails have ridged shanks that grip the wood fibers — they hold nearly as well as screws and you'll attach pickets 2-3x faster. Use 2" to 2-1/2" hot-dipped galvanized ring shank nails. A framing nailer costs $150-250 to buy or $40-60/day to rent.
Techniques & tricks the pros use
- Use a spacer jig: Cut a small block of scrap wood to your desired gap width (or use a 16d nail for ~1/8" gap). Hold it between boards as you nail or screw. Consistent spacing looks professional.
- Clamp warped boards: About 1 in 10 boards will have a bow or twist. Don't fight it with fasteners alone — clamp the board to the rail first, then fasten. The clamp holds it flat.
- Pre-drill near the edges (screws only): Boards split when you screw within 1" of the edge. A quick pre-drill with a 1/8" bit prevents this. Nail guns don't have this problem — nails are thinner and push fibers aside.
- Two fasteners per rail, not one: A single screw or nail per rail lets the board pivot and twist over time. Two locks it flat. The fence stays straight for 20 years instead of 5.
- Board-on-board option: Want it to look finished from both sides? Attach boards to alternating sides of the rails, overlapping 1-1.5". Uses ~30% more boards but eliminates the "good side / bad side" problem — great for shared fences.
Hang the Gate & Install Hardware
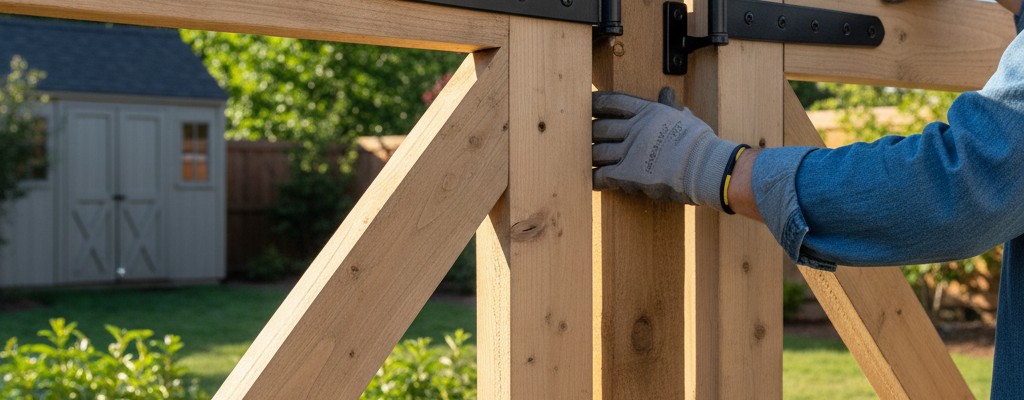
Gates take more abuse than any other part of the fence — opened and closed thousands of times, slammed by wind, pushed by kids. Build them stronger than you think necessary.
Gate post requirements
- Use 6x6 posts for gates, even if the rest of the fence uses 4x4. The extra mass prevents leaning.
- 3 bags of concrete minimum per gate post. The extra concrete anchors against the repeated force of the gate swinging.
- For gate sizing guidance, see our gate sizing guide.
Building the gate frame
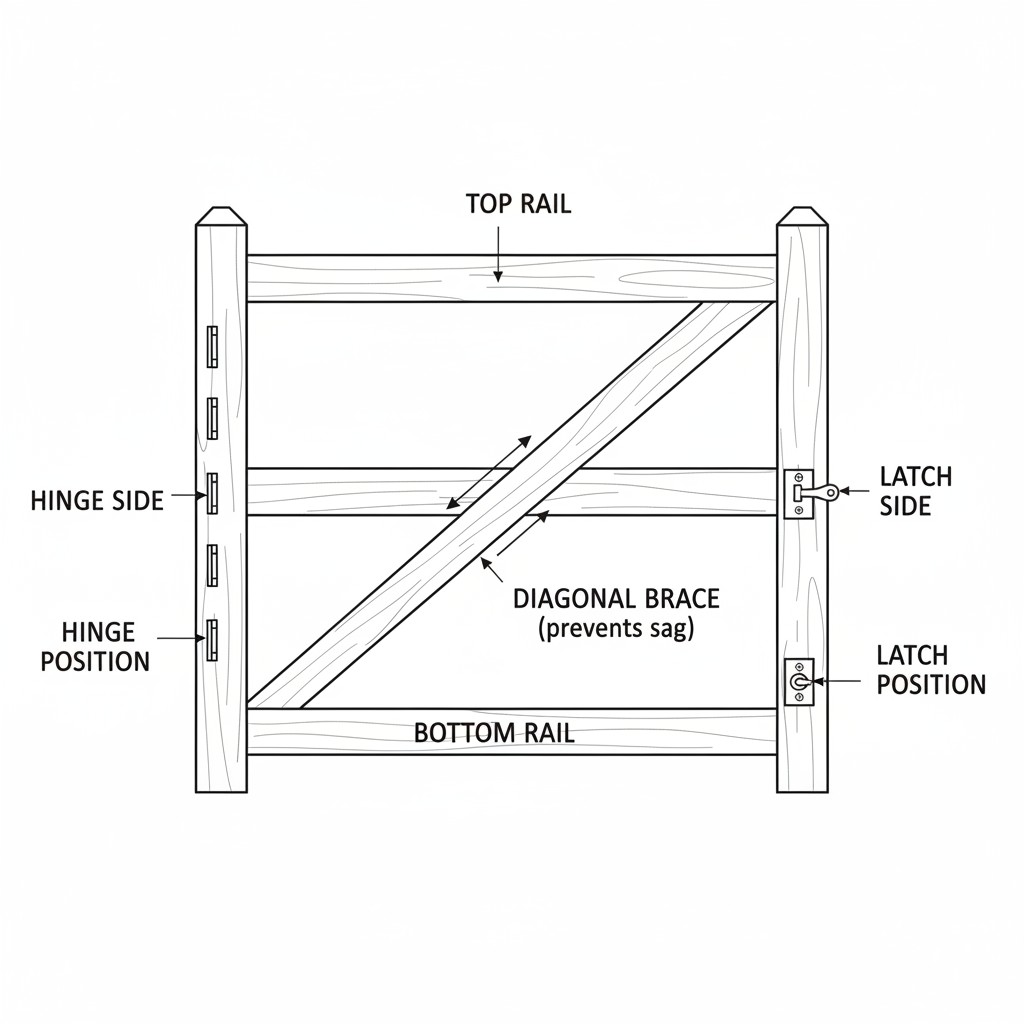
- Build a rectangular frame from 2x4s — measure the opening and subtract 1" total (1/2" clearance hinge side, 1/4" latch side, 1/4" bottom). Use exterior screws through drilled and countersunk holes for a flush surface.
- Add a diagonal brace running from the bottom hinge corner to the top latch corner. This is not optional — without it, the gate sags within months. The brace pushes the latch side up against gravity.
- Attach pickets to the frame using the same method as the fence.
Hanging & hardware
Prop the gate into position using paint stirrers as temporary shims underneath for ground clearance. Clamp the gate to the post with the shims holding the gap, then mark and drill your hinge holes. This is far easier than trying to hold a heavy gate in the air while drilling.
- 3 hinges per gate — top, bottom, and middle. Heavy-duty strap hinges or bolt-through T-hinges rated for the gate weight.
- Latch: A thumb latch or ring latch is standard. For pool enclosures, most codes require a self-closing, self-latching gate with the latch at least 54" above grade.
- Test the swing before calling it done. If the gate binds, a belt sander quickly removes material for proper clearance.
- Double gates: Use a drop rod (cane bolt) on the stationary leaf so wind doesn't catch it. Sink a PVC pipe into the ground as a receiver for the drop rod.
Anti-sag tip: If your gate starts to sag after a year, install a turnbuckle-and-cable anti-sag kit ($15-25). It runs diagonally from the top hinge corner to the bottom latch corner and lets you tension the cable to pull the gate back square.
Recommended gate hardware
Black powder-coated strap hinges. Rated for 50+ lb gates.
View on Amazon →Turnbuckle + cable to prevent sagging. Install from day one — much easier than fixing later.
View on Amazon →Finish & Protect Your Fence
Your fence is built — but unfinished wood degrades fast. Proper finishing extends fence life by 5-10 years.
When to stain
- Cedar: Can be stained within 2-4 weeks of building.
- Pressure-treated pine: Must dry 4-8 weeks first. Do the water drop test — sprinkle water on the wood. If it beads up, wait longer. If it absorbs, it's ready.
Finish options
| Type | Look | UV Protection | Recoat |
|---|---|---|---|
| Semi-transparent stain | Shows wood grain | Good | Every 3-5 years |
| Solid stain | Hides grain (like paint) | Excellent | Every 5-7 years |
| Clear sealer | Natural wood look | Minimal — wood will gray | Every 1-2 years |
Application tips
- A pump sprayer is the fastest method. Back-brush immediately after spraying for even coverage.
- Two thin coats are better than one thick coat — thick coats peel.
- Don't forget the post tops — install post caps to prevent water soaking into end grain. This is the single easiest thing you can do to extend fence life.
Recommended stains & sealers
No back-brushing needed, won't lap or run. #1 rated fence stain. Semi-transparent.
View on Amazon →Clear waterproofing for natural cedar look. Recoat annually.
View on Amazon →Product links may earn a small commission at no cost to you. Recommendations based on durability and value, not commission rates.
Common Mistakes to Avoid
- Posts not deep enough: Mistake #1. Shallow posts lead to leaning fences, especially in freeze-thaw climates. Follow the 1/3 rule.
- Not using a string line: "I can eyeball it" is how you get a wavy fence. Use one for post alignment and another for board height.
- Rushing concrete cure: Hanging rails on uncured posts pulls them out of plumb. 24 hours minimum, 48 in cold weather.
- Skipping the gravel base: Without drainage, water pools at the post base and accelerates rot. 4 inches of gravel takes 2 minutes and adds years of life.
- No diagonal brace on gates: A gate without a brace will sag. Not optional — it's structural.
- Wrong screws with PT wood: Copper preservatives corrode standard zinc-plated screws. Heads snap off within 2 years. Use hot-dipped galvanized or stainless exclusively.
- Not calling 811: Hitting a gas line is dangerous and expensive. The locate service is free and required by law.
Related Guides
- Fence Material & Cost Calculator — Get your exact material list and cost estimate
- How to Install Fence Posts — Deep dive on the most critical step
- Fence Post Depth Guide — Depth chart by fence height and soil type
- How Much Concrete for Fence Posts — Bag counts by post size and depth
- Cedar vs Pressure-Treated Fence — Pick the right wood
- DIY vs Professional Fence Installation — Cost and time comparison